- 50 Actual Exam Questions
- Compatible with all Devices
- Printable Format
- No Download Limits
- 90 Days Free Updates
Get All Dell PowerEdge Operate 2023 Exam Questions with Validated Answers
| Vendor: | Dell EMC |
|---|---|
| Exam Code: | D-PE-OE-23 |
| Exam Name: | Dell PowerEdge Operate 2023 |
| Exam Questions: | 50 |
| Last Updated: | August 24, 2026 |
| Related Certifications: | PowerEdge Operate |
| Exam Tags: | Dell System AdministratorsDell Technical Support Engineers |
Looking for a hassle-free way to pass the Dell EMC Dell PowerEdge Operate 2023 exam? DumpsProvider provides the most reliable Dumps Questions and Answers, designed by Dell EMC certified experts to help you succeed in record time. Available in both PDF and Online Practice Test formats, our study materials cover every major exam topic, making it possible for you to pass potentially within just one day!
DumpsProvider is a leading provider of high-quality exam dumps, trusted by professionals worldwide. Our Dell EMC D-PE-OE-23 exam questions give you the knowledge and confidence needed to succeed on the first attempt.
Train with our Dell EMC D-PE-OE-23 exam practice tests, which simulate the actual exam environment. This real-test experience helps you get familiar with the format and timing of the exam, ensuring you're 100% prepared for exam day.
Your success is our commitment! That's why DumpsProvider offers a 100% money-back guarantee. If you don’t pass the Dell EMC D-PE-OE-23 exam, we’ll refund your payment within 24 hours no questions asked.
Don’t waste time with unreliable exam prep resources. Get started with DumpsProvider’s Dell EMC D-PE-OE-23 exam dumps today and achieve your certification effortlessly!
SIMULATION
Due to recent security breaches and to avoid accidental changes made by the junior IT staff, an
administrator would like to prevent unwanted configuration changes in the iDRAC UI.

To prevent unwanted configuration changes in the iDRAC UI, you can adjust user roles, permissions, or enable specific security settings to restrict access for junior IT staff. Here are the steps to secure the iDRAC configuration:
Step-by-Step Guide:
Access User Settings:
In the iDRAC interface, navigate to iDRAC Settings from the main menu.
Choose User Authentication or Users to manage user accounts and permissions.
Adjust User Roles and Permissions:
Identify the accounts associated with junior IT staff.
For each user account, adjust the role to Read-Only if you want them to have view-only access without making configuration changes.
Alternatively, set their permissions to exclude configuration changes. This may involve assigning a custom role with limited access based on your needs.
Enable Configuration Lock (if available):
Some versions of iDRAC offer a Configuration Lock feature, which prevents any configuration changes until the lock is removed by an administrator.
Navigate to Configuration > System Security or User Authentication, depending on the version, and enable the Configuration Lock option.
Set Up Two-Factor Authentication (Optional):
For added security, enable Two-Factor Authentication under iDRAC Settings > Network or Security settings. This step ensures only authorized users can access and make changes to the iDRAC UI.
Save and Apply Security Changes:
After setting up the desired restrictions and permissions, save the settings to apply the changes.
Verify that junior IT staff accounts now have restricted access and cannot make configuration changes.
Log Out and Test the Changes:
Log out of the administrator account and log in with a junior IT staff account to confirm that the permissions are set correctly.
Ensure that configuration changes are disabled and that the user can only view the iDRAC interface as per the restrictions.
By following these steps, you can restrict junior IT staff from making any configuration changes within the iDRAC interface, thus preventing accidental or unauthorized modifications.
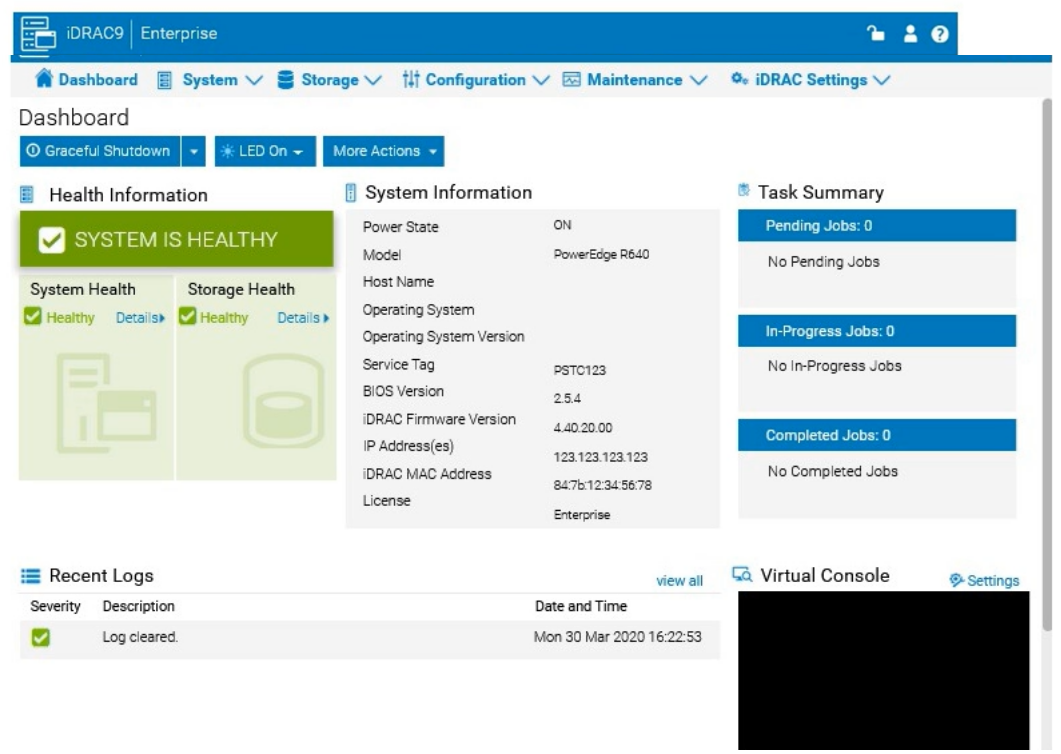
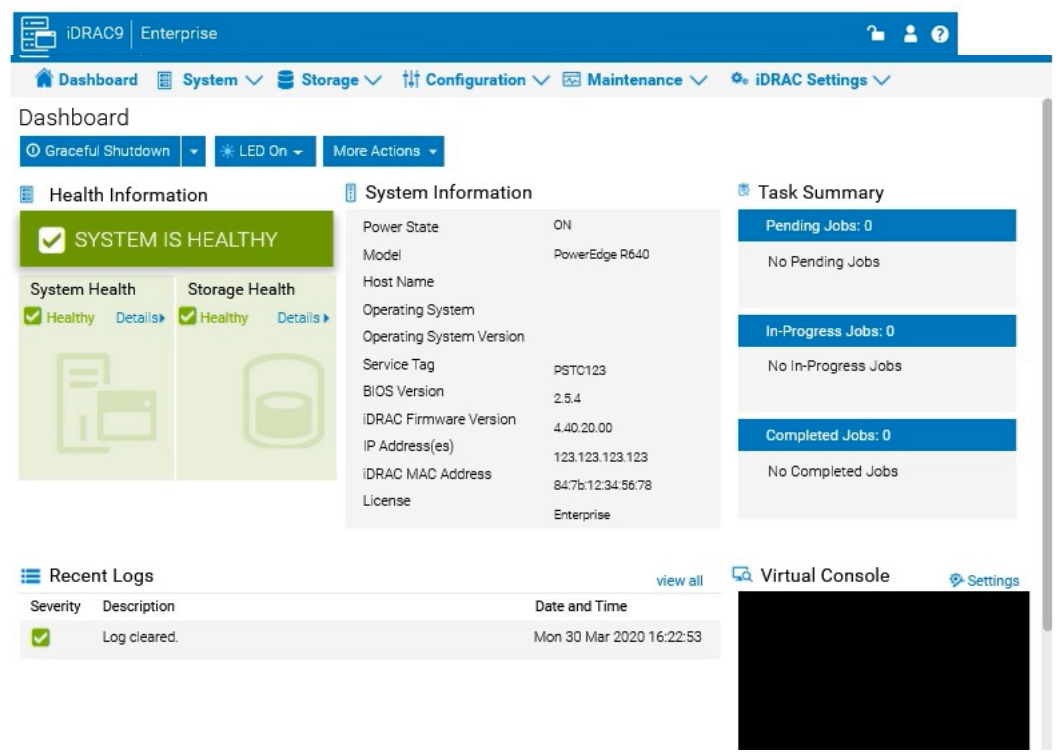
What is the default IP Address for the iDRAC?
Server Management and Configuration Tools (14%)
Define the function of the iDRAC, login procedures, licensing, and connection methods
What is iDRAC?
The Integrated Dell Remote Access Controller (iDRAC) is a management solution built into Dell PowerEdge servers. It provides comprehensive, remote management capabilities, including system monitoring, configuration, and maintenance.
Default IP Address for iDRAC:
The default IPv4 IP address for iDRAC is: 192.168.0.120
Subnet Mask: 255.255.255.0
Default Gateway: Not set by default
Explanation of Options:
Option A: 192.168.1.120
Incorrect: This IP address is not the default for iDRAC.
Option B: 10.1.2.1
Incorrect: Not associated with iDRAC's default settings.
Option C: 10.1.1.1
Incorrect: Also not the default iDRAC IP address.
Option D: 192.168.0.120
Correct: This is the default IP address assigned to iDRAC interfaces.
Accessing iDRAC Using the Default IP:
Network Configuration:
Ensure your management station (laptop/PC) is configured with an IP address in the 192.168.0.x subnet, excluding 192.168.0.120.
Connecting to iDRAC:
Open a web browser and navigate to https://192.168.0.120
Accept any security warnings related to self-signed certificates.
Default Credentials:
Username: root
Password: calvin
Note: For security reasons, newer servers may require you to set a unique password upon initial setup.
Dell Operate Reference:
Server Management and Configuration Tools (14%)
Define the function of the iDRAC, login procedures, licensing, and connection methods: Knowing the default IP address is essential for initial access and configuration of the iDRAC.
System Administration (18%)
Verify health status and iDRAC license: Initial access to the iDRAC is necessary to verify system health and configure licensing options.
Conclusion:
The default IP address for the iDRAC on Dell PowerEdge servers is 192.168.0.120. This address is used for initial setup and can be changed during configuration to integrate with your network environment.
SIMULATION
A customer has relocated one of their Dell PowerEdge platform servers from their main data center to a remote edge location, which uses a different network segment.

Reconfigure the iDRAC network settings with the following information:
. IP Address (CIDR):
192.168.0.120 (/24)
. Gateway: 192.168.0.1
. DNS Server 1: 10.10.0.1
. DNS Server 2: 10.10.0.2
To reconfigure the iDRAC network settings with a new IP address, gateway, and DNS servers, follow these steps in the iDRAC interface:
Step-by-Step Guide:
Access iDRAC Network Settings:
Log into the iDRAC interface.
Go to the iDRAC Settings tab in the top menu.
Select Network from the dropdown options. This will open the network configuration page.
Change IP Address and Subnet Mask:
In the Network settings, locate the section for IPv4 Settings.
Set the IP Address to 192.168.0.120.
For the Subnet Mask, since it's a /24 CIDR, set it to 255.255.255.0.
Configure the Gateway:
In the same section, find the field for Default Gateway.
Enter the Gateway as 192.168.0.1.
Update DNS Server Information:
Scroll down to the DNS Server settings.
Enter DNS Server 1 as 10.10.0.1.
Enter DNS Server 2 as 10.10.0.2.
Apply the Settings:
After entering all the new network information, click on Apply or Save to confirm the changes.
The iDRAC interface may prompt for a restart to apply network changes. Follow any prompts as needed.
Verify the Configuration:
After applying the changes, check that the iDRAC is accessible at the new IP address 192.168.0.120.
Confirm that the gateway and DNS settings are properly configured by testing connectivity or accessing the iDRAC from a device within the same network segment.
By completing these steps, you will have reconfigured the iDRAC network settings for the new network segment, allowing remote management of the Dell PowerEdge server at the edge location.
What is indicated when the Mid-Bay hard drive LED indicator is solid amber?
Understanding Hard Drive LED Indicators in Dell PowerEdge Servers
Server Troubleshooting (32%)
Analyze the visual indicators on server components - system ID, PSU, and BLINK
Overview
Dell PowerEdge servers utilize LED indicators on hard drive carriers to provide immediate visual feedback on the status of the drives. These indicators are essential for quick diagnostics and troubleshooting.
Hard Drive LED Indicator Meanings
Typically, the hard drive carrier has two LEDs:
Activity LED (Green): Indicates drive activity (read/write operations).
Status LED (Green/Amber): Indicates the status of the drive.
Status LED Colors and Patterns
Off: Drive is not present or powered off.
Solid Green: Drive is online and functioning normally.
Blinking Green: Drive is being accessed or undergoing initialization.
Blinking Amber: Drive has entered a predictive failure state (SMART alerts).
Solid Amber: Drive has failed or lost connectivity.
Analyzing the Scenario
Solid Amber LED on Mid-Bay Hard Drive: This indicates a critical issue with the drive.
Explanation of Options
Option A: Hard Drive has been removed
Analysis: If the drive is removed, the status LED would be off because there is no power to the drive.
Conclusion: Incorrect.
Option B: Hard Drive temperature is normal
Analysis: A normal temperature would not trigger an amber LED. Temperature warnings are usually indicated by system alerts or different LED patterns.
Conclusion: Incorrect.
Option C: Hard Drive has lost connectivity with the PERC
Analysis: A solid amber LED often means the drive is not communicating with the RAID controller (PERC). This could be due to a failed drive or a connectivity issue.
Conclusion: Correct Answer.
Option D: Hard Drive has entered a predictive failure status
Analysis: Predictive failures are typically indicated by a blinking amber LED, warning of impending drive failure.
Conclusion: Incorrect.
Dell Operate Reference
Server Troubleshooting (32%)
Analyze the visual indicators on server components: Understanding LED indicators is crucial for diagnosing hardware issues promptly.
Server Components (26%)
Define storage options, Drives, PERC: Knowledge of drive statuses and RAID controller interactions aids in accurate troubleshooting.
Conclusion
A solid amber LED on the hard drive indicates that the drive has failed or lost connectivity with the PERC controller. This status requires immediate attention to replace the drive or resolve the connectivity issue to prevent data loss.
Exhibit.

A customer notices that an indicator on the left control panel of the PowerEdge Server has turned solid amber.
What does this indicate?
Dell PowerEdge servers are equipped with various LED indicators on the left control panel to provide immediate visual feedback about the server's status and component health. These indicators help in quickly identifying and troubleshooting issues without needing to access the system logs immediately.
Analyzing the Visual Indicators (Server Troubleshooting - 32%)
As per the 'Server Troubleshooting' section, one of the key skills is to 'Analyze the visual indicators on server components - system ID, PSU, and BLINK.'
Color Codes and Their Meanings
Solid Green Light: Indicates normal operation.
Blinking Green Light: Indicates activity (such as data transfer).
Solid Amber Light: Indicates a fault or error condition.
Blinking Amber Light: Indicates a critical error or failure.
Application to the PCIe Card Indicator
In this scenario, the customer notices that an indicator on the left control panel has turned solid amber. Specifically, this indicator is associated with the PCIe card.
Option A: 'PCIe card is present.'
Presence is usually indicated by a solid green light, not amber.
Option B: 'PCIe card performing a firmware update.'
Firmware updates are often indicated by blinking lights but typically not solid amber.
Option C: 'PCIe card temperature is normal.'
Normal temperature conditions would not trigger an amber light; instead, they would maintain a solid green light.
Option D: 'PCIe card experiences an error.'
A solid amber light directly correlates with an error condition in the component.
Conclusion
Given the meaning of the solid amber indicator and its association with error conditions in Dell PowerEdge servers, the correct interpretation is that the PCIe card is experiencing an error.
Dell Operate Reference
Server Components (26%): Understanding server components like PCIe cards is crucial.
Server Troubleshooting (32%): Analyzing visual indicators is a key troubleshooting step.
Analyze the visual indicators on server components: Knowing the significance of LED colors aids in swift problem identification.
Security & Privacy
Satisfied Customers
Committed Service
Money Back Guranteed