In Autodesk Revit Electrical Design, panel schedules display data that originates from the Electrical Circuits category, not directly from the Electrical Equipment or Electrical Fixtures families. Each circuit in a panel schedule represents an instance of an Electrical Circuit object within Revit's system-based MEP structure. Therefore, to add an additional field like Breaker Type, the parameter must be created and assigned specifically to the Electrical Circuits category.
According to the Revit MEP User's Guide -- Chapter 50 ''Electrical Systems and Panel Schedules'':
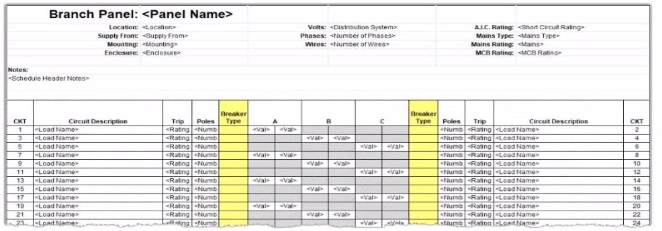
''Panel schedules display parameters that are associated with electrical circuits, including load names, rating, poles, and breaker information. To include additional circuit information in a panel schedule, create a Project Parameter assigned to the Electrical Circuits category.''
This means the designer should:
1 Open Manage Project Parameters Add
2 Create a Project Parameter named Breaker Type
3 Assign it to the Electrical Circuits category
4 Set it to appear in schedules and tags, ensuring it becomes available for use in the panel schedule template
As noted in the Smithsonian Facilities Revit Template User's Guide:
''Custom circuit data fields such as 'Breaker Type' or 'Wire Tag' are defined as project parameters applied to the Electrical Circuits category so they can be displayed in panel schedule templates.''
Incorrect options:
A . Shared Parameter in Electrical Equipment --- Electrical Equipment holds overall panel data (e.g., Mains Rating, Voltage) but not per-circuit data.
B . Shared Parameter in Electrical Fixture families --- Fixtures are individual load devices, not part of the circuit's breaker assignment.
D . Project Parameter assigned to Electrical Equipment --- would apply to the panelboard as a whole, not to individual breakers in circuits.
Thus, the correct answer is C. Project Parameter assigned to Electrical Circuits, ensuring each breaker in the panel schedule can display its type individually and dynamically.
References:
Autodesk Revit MEP User's Guide -- Chapter 50 ''Electrical Systems and Panel Schedules,'' pp. 1134--1142
Smithsonian Facilities Revit Template User's Guide -- Section 8.7 ''Electrical Panel Schedule Customization,'' p. 91
Autodesk Revit Electrical Design Essentials -- ''Custom Circuit Parameters and Schedule Configuration''